Recently, the release of the DeepSeek R1 model has made a huge splash in the entire AI community. During the post-training phase, the R1 model extensively adopts reinforcement learning techniques. This allows it to greatly enhance its inference capabilities even with a minimal amount of annotated data. In tasks like mathematics, code, and natural language inference, it outperforms the official version of OpenAI o1.
Currently, DeepSeek has open-sourced the DeepSeek R1 and DeepSeek R1-Zero models. Through model distillation, six smaller-scale models (1.5b, 7b, 8b, 14b, 32b, 70b; "b" stands for billion) have also been made publicly available.
This article will guide you through the process of quickly deploying the DeepSeek R1 model locally on your Mac.
Mac Configuration
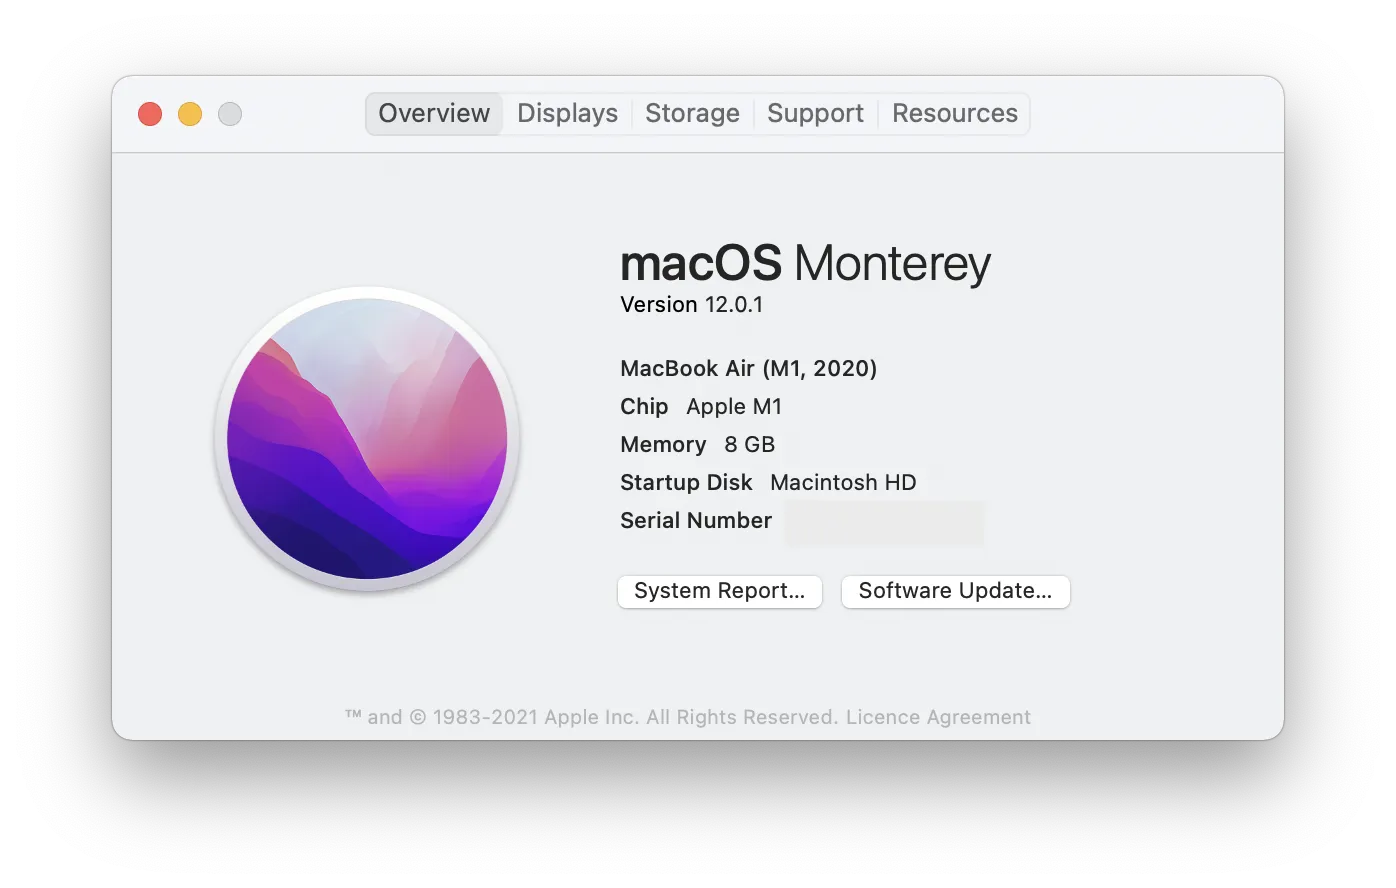
Here is my Mac configuration. In this deployment, I used the 7b model, and after my personal testing, it can run with some effort.
- macOS Monterey
- Version 12.0.1
- MacBook Air (M1, 2020) with an Apple M1 chip and 8 GB of RAM
Instructions on Running Methods
There are two relatively straightforward methods for using large-scale models on Mac, and both are also compatible with Windows and Linux systems.
- Use ollama.
- Use LM Studio. LM Studio provides a visual interface, while ollama operates via the command line. Both tools can run numerous open-source models. After configuration, tens of thousands of large-scale models on HuggingFace can also be utilized freely.
In this article, the demonstration will use ollama.
1. Install Ollama
Visit the official ollama website at https://ollama.com/. Download the appropriate version according to your device's system and install it.
[There is a button labeled "Download" on the website. After clicking it, you can install the command-line tool.]
Open the terminal and type ollama -v. If the version number is displayed, it indicates that ollama has been successfully installed.
2. Execute the Command to Install DeepSeek R1
Search for the DeepSeek R1 model on the Ollama official website. You'll find that the R1 model comes in 7 different parameter sizes (1.5b, 7b, 8b, 14b, 32b, 70b; B stands for Billion). Generally, the larger the number of parameters, the better the model's performance, but it also places higher demands on computer configurations. You can download models with larger parameters based on your device's capabilities. (If your configuration is decent, it is recommended to download the 32B or 70B models, as these two models outperform OpenAI o1-mini in multiple capabilities.) My device is a MacBook Air (M1, 2020) with 8 GB of RAM, so I chose the 7B small-scale model here.

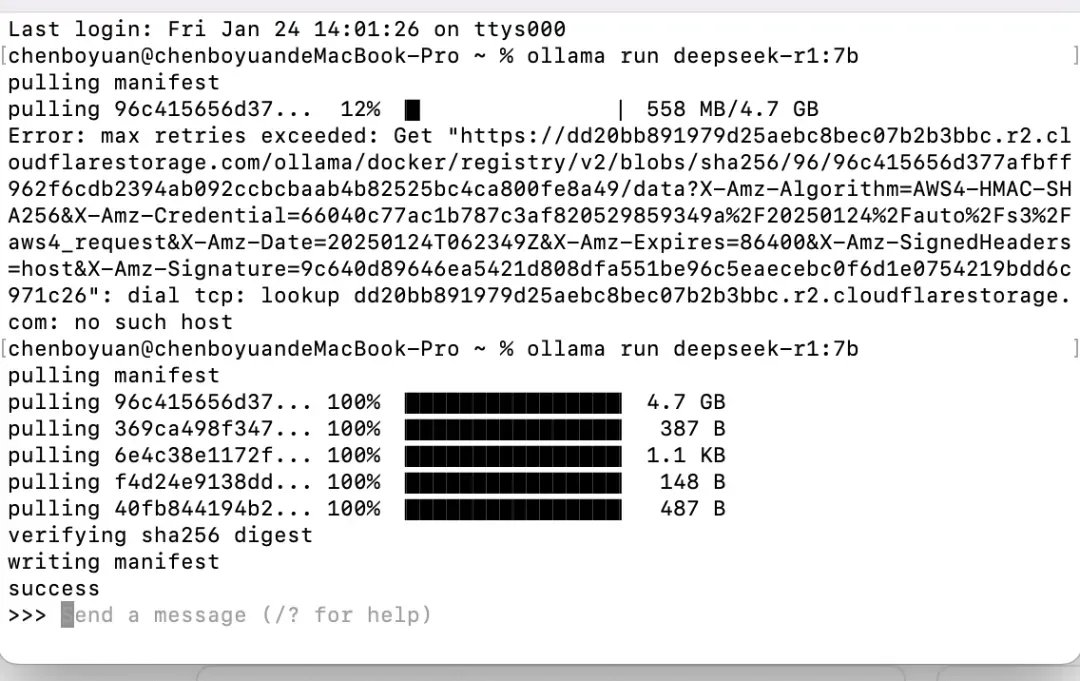
After selecting the model, copy the corresponding running code. Then, open the terminal and enter the code ollama run deepseek-r1:7b.
The system will automatically download the model. Once the download is complete, an interactive interface will appear.
3. Experience Q&A with the DeepSeek R1 Large-Scale Model
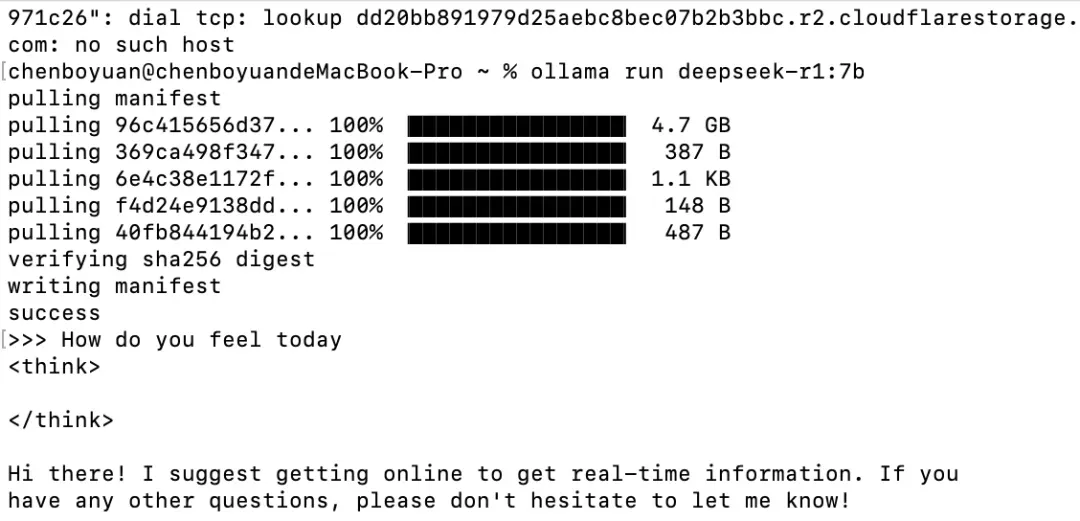
At this point, we have completed the local deployment of DeepSeek R1 and can start experiencing our exclusive edge-side large-scale model.
Summary
In summary, to rapidly deploy the DeepSeek R1 model locally on Mac, first install Ollama from its official website. Then, execute the command to install the specific DeepSeek R1 model according to your device's configuration on the Ollama website. Finally, you can experience the Q&A function of the DeepSeek R1 large-scale model after the installation is complete.
